Incident offers two different status choices to use when completing work, Complete and Closed Incident. Some organizations prefer to use just one and others will use both. When using both, the Complete status will usually indicate that the work has been done, but there is information that still needs to be added to the incident, such as transactions. The Closed Incident status is used when all of the information on the incident has been documented. When an incident has been marked in the Closed Incident status, transactions and other notes can no longer be added. *Note: If changes need to be made to a Closed Incident, you can change the status to Complete, make the necessary changes, and move the status back to Closed.
How to Change the Status of an Incident
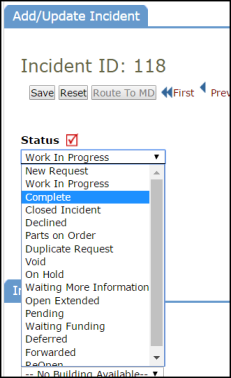
If you need to change the status of an incident, including marking it Complete or Closed, you can do so from the Incident form.
- Search for and open the incident.
- Select the new status from the Status drop down list.
- Click Save.
Other Ways to Mark an Incident Complete or Closed
There are several other ways to mark an incident Complete or Closed:
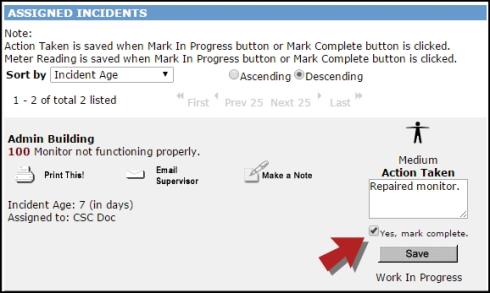
From the Home Page
- Certain roles can mark their assigned incidents Complete from the Assigned Work section of their home page.
- Check the Yes, mark complete box and click Save.
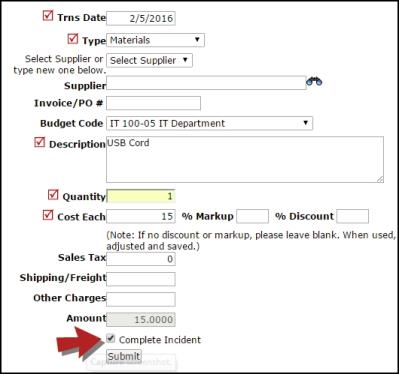
From the Purchase Transaction Screen
- If you are adding Purchase Transactions to the incident, you can mark the incident Complete from the transaction screen.
- Put a check in the Complete Incident box and click Submit.
From the Labor Transaction Screen
- If you are adding Labor Transactions to the incident, you can mark the incident Closed from the transaction screen.
- Put a check in the Work Close? box and click Save.

- You can also Batch Close multiple incidents at one time. To learn more about this feature, see Batch Closing Incidents.
